Our New 1930s Glider - Minimoa Mo2a
- Jun 12, 2024
- 3 min read

Hi everyone,
in this blog post we introduce you to our new project: Minimoa Mo2a (Scale 1:6) and share with you some details about this amazing glider.
Let me show you some of the design work I had to go through.
The Mo2a is an extended version of the normal Minimoa.
It is 360 mm longer than the normal Minimoa and has some more design changes.
But see it for yourself in the following comparison pictures.


Here you see me starting the fuselage. The Mo2a has an extra long canopy.
Unlike Mo2a models of other designers, our Mo2a Canopy area doesn`t contain just a big blister canopy, no, our part is build bit by bit starting at the frame.
This makes our model look much more realistic.


Here you see me working on several detail parts of the cockpit.
The Mo2a has an impressive cockpit with many detailled parts such as panels, seats, seat belts, and control sticks (which need to be made with the PVC thin sleeves in the kit).

Next up, I work on the wings. Compared to the normal Minimoa, the Mo2a has added flaps. This makes the Mo2a easier to land and more stable while landing.


In the next step I will work on covering the fuselage.
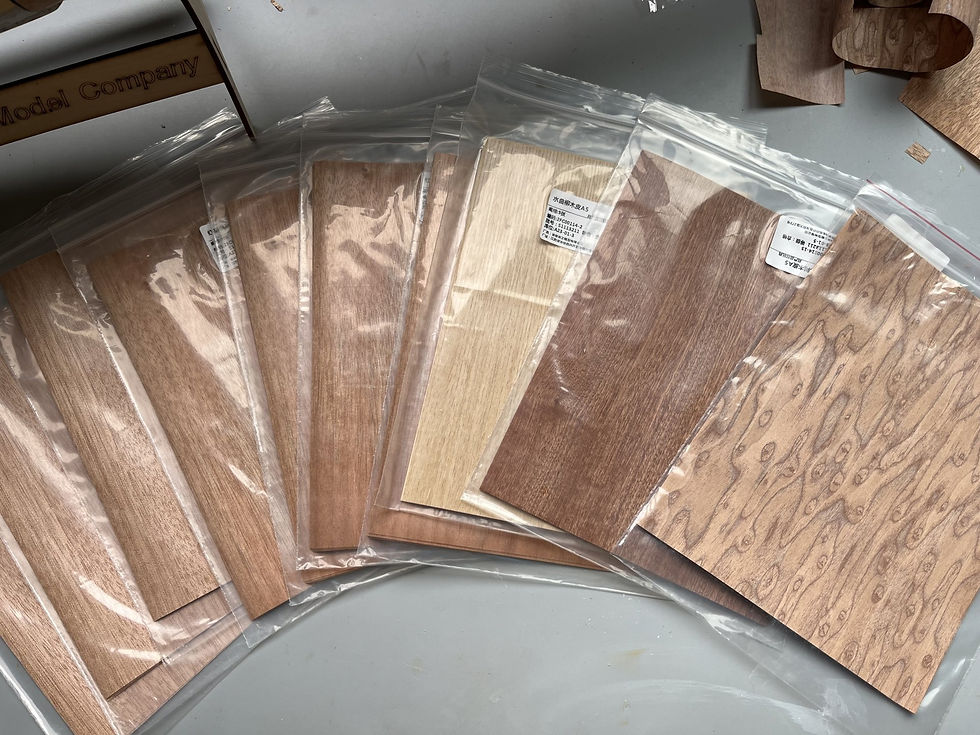
Here I use thin wood chips (thickness only about 0,1 mm).
These wood chips are made of raw wood and the backside has a non-woven fabric (cotton) to avoid chipping.
In this Step I choose 3 different textures.

Step 1:
To start, I draw lines on the fuselage.
With this technique I let the Mo2a look even more realistic.
Tip: Use some Mo2a original pictures to draw the lines at the right places, do not follow the seams of the balsa wood kit.

Step 2:
Now I cut the thin wood chips into shape.
Tip: Cover the fuselage with a layer of transparent film, then use a pen to draw the lines on the film and use it as a sample.
Step 3:
Now I attach the wood chips to the fuselage.
In this step I use normal wood glue (Titebond), dilute it with water and then then put the sheet on the fuselage.
I also use a model iron in this step going back and forth on the wood sheet.
If the glue seeps out under the sheet, you have to sand the parts after they are glued together to remove the remains of the glue.


Step 4:
Here I apply varnish. I used acrylic varnish mixed with oak colorant.
After painting the Mo2a with this color mix myself, I would recommend a different brown color.
My Mo2a looks a bit yellow.

In Step 1 to Step 4 I showed you the entire process for the wood chip part.
I also made a YouTube video to show you the full process: https://youtu.be/7pzg9g4-O-Q
For the entire fuselage, there are also other non-wood grain parts.
In my building process, I used the normal spray paint process.
So in Step 1, I make a first thin layer with putty to cover the balsa grain.
Then in Step 2 and 3 I add 2 more layers with putty (sand the surface carefully after each layer).
Finally, in Step 4, I add the final topcoat.


Next up is the preparation of more small parts, which are sprayed in advance before being installed to the fuselage.


The final assembly is simple.
The Mo2a wings and tail are made of ordinary plastic heat shrink film, which can be carefully worked with an iron for a day.
For the electronic parts, I used two different channels to control the two servos.
The Minimoa Mo2a is now available in our shop.
All Building Instructions, Recommendations and Drawings are also on our Mo2a Minimoa Shop Page ready to download and study.


Comments